Author Archives: Markus Grohs
TMT [Thirty Meter Telescope]
Virtual Private Network [VPN]
I wanted to tell you about something new. [Well at least it is new to me]. It is call a Vitual Private Network [VPN]. This is a service that is supposed to protect your identity while surfing the internet, Especially if you use a w-fi connection or other wi-fi networks such as public (McDonalds, Starbucks, Amazon, etc.)
What this service does…
To be continued …
…
Software to Keep your Passwords Safe
In this world of technology, I can not emphasize how important it is to keep your passwords safe from online hackers, data thieves, etc. It seems like there have been a lot of security breaches lately. If these people can hack into big corporations like Target, eBay, JPMorgan Chase, just to name a few. Who knows they can hack into yours also? We have to make sure we choose a password that we feel safe with and easily remember.
The only problem with that, is choosing a password. Sometimes you have to make up a password to access a password program, which can be very frustrating and annoying.
We would like to have it easily accessible by storing it in our smartphones app such as ‘Notes’ or in your wallet which really isn’t too safe. I’m guilty of doing this. Oops! I just gave awa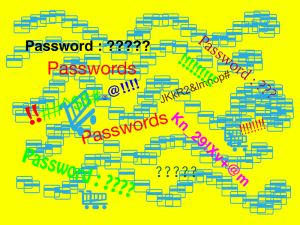 y my secret. [ I better start erasing my passwords right away]. But seriously, I like to change my passwords at least every two or three months. Which can be very humbug.
Like they say in choosing a password not to create one that is so obvious like your birthdate, house address or my favorite, “Ihatepasswords!” Before you decide on whether or not you should use a password program ask yourself, ‘is it a want or a need?’
Here is a list of software programs that are free and/or trial versions that you can purchase after your trial period has expired. [Some do not offer trials].
ChatSecure Price: Free Source: For iPhone and Android
Hotspot Shield Price: Free, Hotspot Shield Elite, $30/ year
LastPass Price: Free [Online version] ; Mobile, $12/ year Safeplug Price: $49
ShazzleMail Price: Free
NOOK BNTV600
It finally happened. Again! I think my baby daughter eats tablets. This is the third tablet she’s working on. Not to mention the Samsung tablet that she broke by pulling the charger out of the port so it won’t charge.
I like the NOOK [Model number BNTV400] because it is very easy to use, except for the fact that I really don’t like the small buttons that are used to control the volume, but othe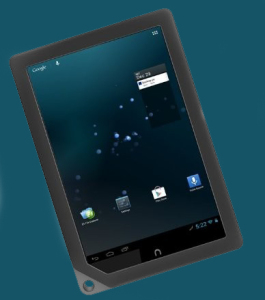 r than that it is very easy to set up and download apps. One feature I like about the NOOK, is that it lets you give it a personal touch where you can have the screen title say, “Markus NOOK”, and also you can choose an avatar (animated pic) as the slider to unlock the tablet to display the home screen.
Another feature, the apps that were recently used are displayed as a deck of cards on the home screen, that way you really don’t have to place the apps on the desktop, unless you really want to. Also I like the battery life
So far this the best tablet she’s owned, and hopefully the last (for awhile) that we’ll have to replace.
Nook HD+ 9″ 16GB Wi-Fi Color Tablet
Canon PowerShot 115 IS Digital Camera
I just purchased a Canon PowerShot 115 IS. Although it is a compact point-and-shoot digital camera, I think it is great (so far) for the money ($79.95) not including the 16 GB memory card which you have to purchase anyway. I like to have at least one compact camera that I can take along with me at all times. I only use my Nikon J1 for more professional looking photos. I guess you can have professional looking photos with a point and shoot camera as well. If you know how to use the ‘program’ mode and experiment with the settings.
I originally went to the store to buy a Nikon compact point-and-shoot camera that was advertised in the paper. When I found it was sold out, and that the camera was on sale since last Monday, (and only now it was advertised in the Sunday paper) I was a little upset that they put the ad in six days later. But I guess that was a blessing in disguise. Because I ended up with a better camera also my first Canon camera. Even though I had to spend $30 more for the camera. So this will be my new albatross…(oops!) I mean friend that I’ll take along with me everywhere I go.
I’ll just post the specs that I copied from the internet. Since I like reading the specs for different cameras, and other electronic gadgets. [Even though I might not understand what some of them mean]. Although it doesn’t have Wi-Fi, and all those novelty features such as Magic Frame, I’m still happy with it. Happy photographing.
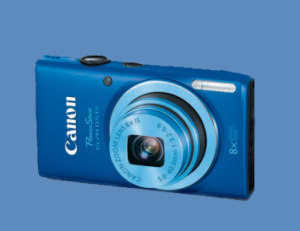
Product Highlights:
2.7-inch TFT color LCD with wide-viewing angle monitor
16.0 megapixel 1/2.3-inch CCD sensor
DIGIC 4 image processor for exceptional performance
8x optical zoom with 28mm wide-angle lens
720p HD video with a dedicated movie button
Canon PowerShot ELPH 115 16MP Digital Camera (Blue)
Making A Simple Collage Using Photoshop
Here is a simple tutorial in making a collage. I enjoy using Photoshop for my images taken with my camera. This tutorial is very fun and simple. So for the more advanced
Photoshop user, this tutorial would be too simple. I like to start out by putting some of my favorite images on my Desktop, so that it is easily accessible when you need to pick out the ones you will be using.
You can use as many as you want, but you need to remember that you will have to calculate dimensions, cropping, resizing the images in order for them to fit on your collage. I suggest using about five to six photos. That way later on you’ll be able to make more advance collages with borders, etc.
You should start out by drawing a simple template on a piece of paper. You can get ideas off the internet by searching for templates used for collages. You may also have one of those picture frames that have all different shapes, such as ovals, rectangles, circles, squares, etc. But those take a little more time to create. So I would just stick to something simple until you get the hang of it.
First, pick out the photos that you may want to use and put them on your desktop. [So that it is easily accessible] I try to pick out maybe six to seven photos and place them on my desktop. Because you may not want to use all of them. But you can always use them for another collage later on.
Open Photoshop I use Photoshop CS6. If you don’t have Photoshop, there is a free photo editing program that you can install on your computer from the internet. Just Google : Gimp
Okay let’s get started.
Step 1: Click on ‘File’ and select ‘New’. Set the dimensions to: (Width: 1024, Height: 768) and click on ‘OK’
Step 2: Right-Click the photo on your Desktop that you want to use and select, ‘Open With’ and click on ‘Adobe Photoshop’ or ‘Gimp’ [this will open the Photoshop or Gimp program]
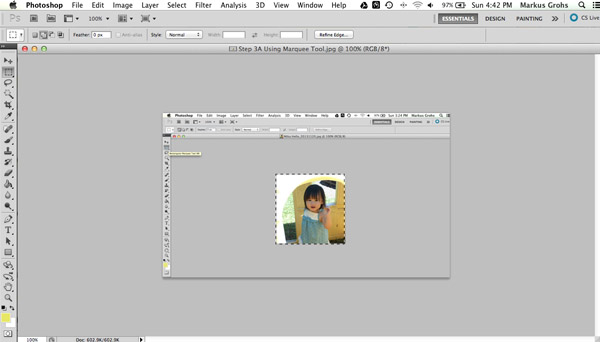
Step 3: Now use your ‘Rectangular Marquee Tool’ (M) and outline the image. [You may need to resize the image]
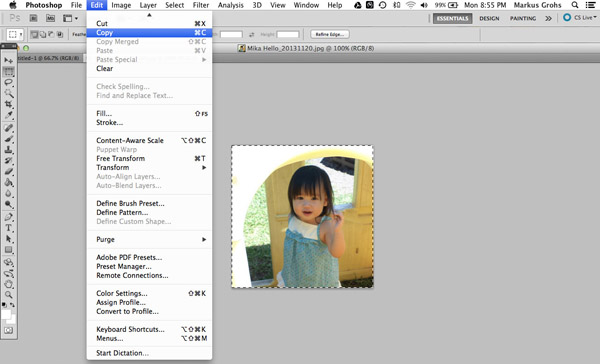
While the image is outlined, go to ‘Edit’ and select ‘Copy’
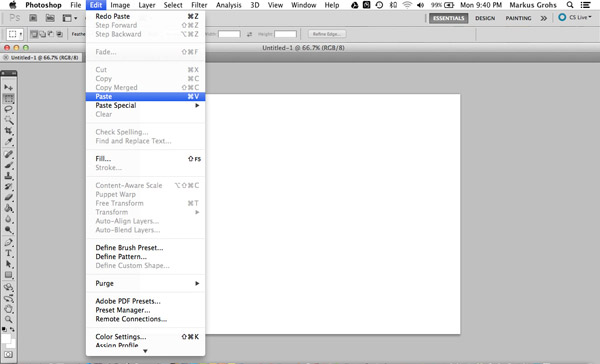
Now go to your canvas (I just keep the canvas as ‘Untitled’ , or you can save it as, ‘Collage_1’). Select ‘Edit’ and click on ‘Paste’
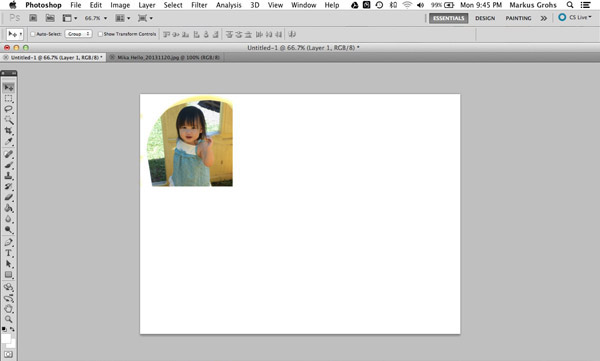
You can now see the image copied on the canvas.
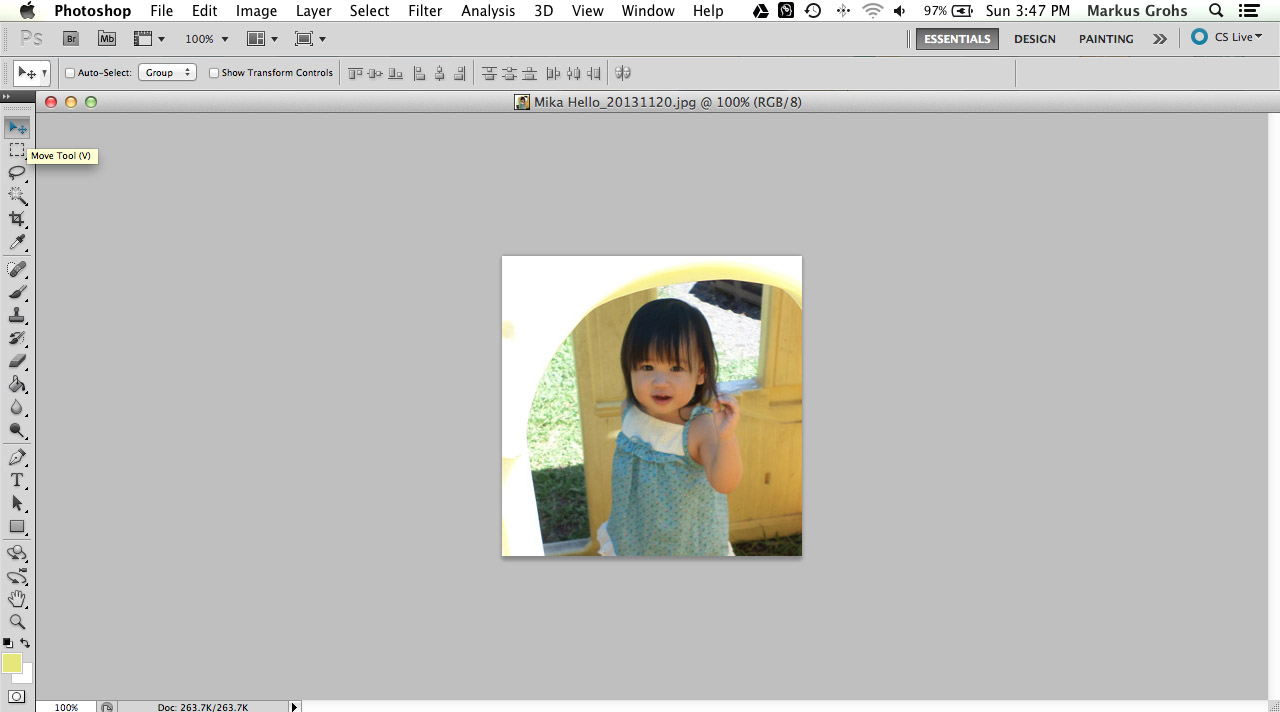
Step 4: Select the ‘Move Tool’ (V). Grab the image and move to where you want it on the canvas. Set it where you want it on the canvas.
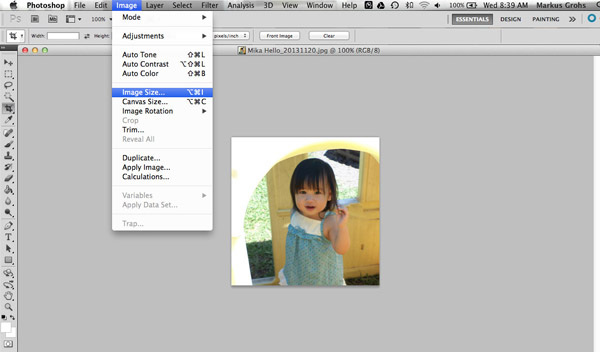
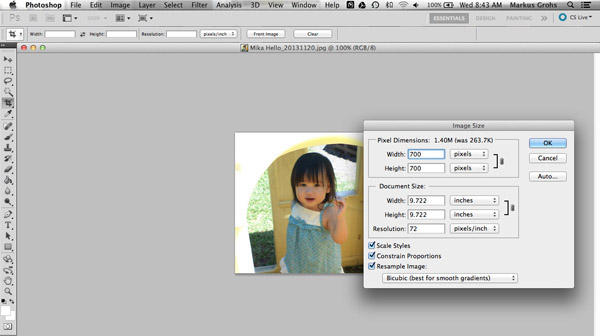
You may need to resize and crop the images.To add more images, repeat Steps 2 to 4 as needed.
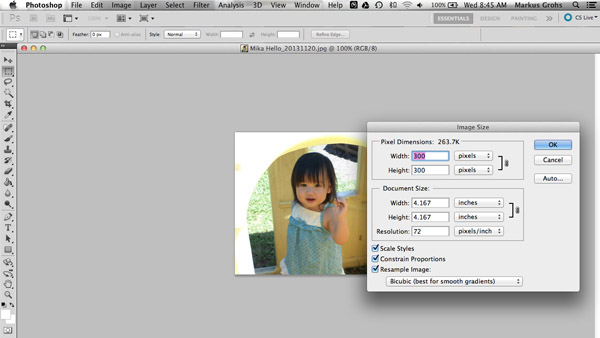
I didn’t want to make this tutorial too complicated. You just have to play with different values to resize the images.
Here are snapshots on how to resize images.
Step 2: Resizing Image
Step 3: Resizing Image
Here is the finished product. I used borders on mine. Once you get the hang of it, it will be fun to make your own personal collage and maybe for others. Just experiment and enjoy.


![Making Simple Collage [Step 1 A]](http://techthingsareneat.com/wp-content/uploads/2014/10/Making-Simple-Collage-Step-1-A.jpg)
![Making Simple Collage [Step 1 B] [Canvas]](http://techthingsareneat.com/wp-content/uploads/2014/10/Making-Simple-Collage-Step-1-B-Canvas.jpg)
![Making Simple Collage [Step 2]](http://techthingsareneat.com/wp-content/uploads/2014/10/Making-Simple-Collage-Step-2.jpg)
